Drop Down Menu

dropdown SAP

How to Add Social Media Buttons to the Top of your Blogger Posts

how to add facebook twitter and g+ share button on blogger

How to Add Social Media Buttons to Blogger Posts

 
1.Back Up your blog's template
2.Go to Layout then Edit HTML tab.
3.Check Expand Widget Templates.
4.Now find this code:
<data:post.body/>


Place the following code right before the code.

<!-- Scripts Start -->
<b:if cond='data:post.isFirstPost'>
<!-- Facebook -->
<div id='fb-root'/>
<script>(function(d, s, id) {
var js, fjs = d.getElementsByTagName(s)[0];
if (d.getElementById(id)) {return;}
js = d.createElement(s); js.id = id;
js.src = &quot;http://connect.facebook.net/en_US/all.js#xfbml=1&quot;;
fjs.parentNode.insertBefore(js, fjs);
}(document, &#39;script&#39;, &#39;facebook-jssdk&#39;));
</script>
<!-- Google +1 -->
<script type='text/javascript'>
(function() {
var po = document.createElement(&#39;script&#39;); po.type = &#39;text/javascript&#39;; po.async = true;
po.src = &#39;https://apis.google.com/js/plusone.js&#39;;
var s = document.getElementsByTagName(&#39;script&#39;)[0]; s.parentNode.insertBefore(po, s);
})();
</script>
<!-- Twitter -->
<script>!function(d,s,id){var js,fjs=d.getElementsByTagName(s)[0];if(!d.getElementById(id)){js=d.createElement(s);js.id=id;js.src=&quot;//platform.twitter.com/widgets.js&quot;;fjs.parentNode.insertBefore(js,fjs);}}(document,&quot;script&quot;,&quot;twitter-wjs&quot;);</script>
</b:if>
<!-- Scripts End -->
<!-- Horizontal social buttons Start -->
<div class='horizontal-social-buttons' style='padding:10px 0 10px;'>
<!-- Twitter -->
<div style='float:left;'>
<a class='twitter-share-button' data-count='horizontal' data-lang='en' data-related='' data-via='' expr:data-text='data:post.title' expr:data-url='data:post.url' href='https://twitter.com/share'>Tweet</a>
</div>
<!-- Google +1 -->
<div style='float:left;'>
<g:plusone annotation='bubble' expr:href='data:post.url' size='medium'/>
</div>
<!-- Facebook Like+Send -->
<div style='float:left;'>
<fb:like colorscheme='light' expr:href='data:post.url' font='' layout='button_count' send='true' show_faces='false'/>
</div>
<!-- Pinterest Start -->
<b:if cond='data:blog.pageType == &quot;item&quot;'>
<div id='pin-wrapper' style='float: left; margin:0px 0px 0px 30px; width:44px;'>
<a data-pin-config='beside' data-pin-do='buttonPin' expr:href='&quot;http://pinterest.com/pin/create/button/?url=&quot; + data:post.url'><img src='//assets.pinterest.com/images/pidgets/pin_it_button.png'/></a>
<span style='margin-left:-44px;'><a data-pin-config='beside' data-pin-do='buttonBookmark' href='//pinterest.com/pin/create/button/' style='outline:none;border:none;'/></span>
</div> 
<script src='http://assets.pinterest.com/js/pinit.js' type='text/javascript'></script>
<style type='text/css'> 
#pin-wrapper > a {background-image:none !important;}
</style> 
</b:if> 
<!-- Pinterest End -->
</div>
<div style='clear: both;'/>
<!-- Horizontal social buttons End -->


How to Add Facebook Share Button in Blogger posts


Social media could be great source of quality traffic for any blog.There are many popular social media sites like twitter,stumble upon,Digg and Facebook.There are many social media widgets available for blogger like Pop Up Fixed Bookmarking Gadget For Blogger and Twitter one Click Follow button For Blogs.So today I am going to share How to Add Facebook Share Button in Blogger posts.
Recommended:Cool Flying Twitter Bird Gadget For Blogger 
Floating Facebook Like and Retweet Counters for Your Websites

Steps to Add Facebook Share Button Below Post Title

It is very easy to add Facebook Share Button in Blogger posts.
1.Back Up your blog's template
2.Go to Layout then Edit HTML tab.
3.Check Expand Widget Templates.
4.Now find this code:
<data:post.body/>
5.Place the following code right before the code.
<!-- Facebook Button -->
<div style='float: left; padding: 5px; '>
<a expr:share_url='data:post.url' name='fb_share' rel='nofollow' type='TYPE OF BUTTON'/>
<script src='http://static.ak.fbcdn.net/connect.php/js/FB.Share' type='text/javascript'/>
</div>
<!-- Facebook Button -->
6.Save your template and that's all.

Steps to Add Facebook Share Button Below Post Body

1.Back Up your blog's template
2.Go to Layout then Edit HTML tab.
3.Check Expand Widget Templates.
4.Now find this code:
<data:post.body/>
5.Place the following code right Below the code.
<!-- Facebook Button -->
<div style='float: left; padding: 5px; '>
<a expr:share_url='data:post.url' name='fb_share' rel='nofollow' type='TYPE OF BUTTON'/>
<script src='http://static.ak.fbcdn.net/connect.php/js/FB.Share' type='text/javascript'/>
</div>
<!-- Facebook Button -->

Button modifications

You can also change the button type like adding a counter with the button. All you need is to replace TYPE OF BUTTON from the above code with:
1.box_count for a button like this:

2.button_count for a button like this:

3.button for a button like this:


4.Icon for a button like this:


Hope you find this useful.Share if you like it.Drop comments in the comment box.


Add Each Blog Post In Separate box

Add Each Blog Post In Separate box


Box

If you are trying to design your blog and make it neat and clean then you will try to separate each blog post .In blogger default template every post is displaying in same panel it become harder for reader to differentiate post,In this post I will give Css code which make your post separate in boxes.

Follow Below Steps to  separate  each blog post

  1. Go to blogger Dashboard.
  2. Click On Template Tab.
  3. Now Click On Customize button.
  4. Now Click on Advanced link
  5. Now click on Add CSS And paste the following code there.
.post {
background:#FFFFFF;
border: 2px solid #000000;
padding-right:7px;
padding-left:7px;
}
.post:hover {
border: 2px solid #FF0000;
}
.post:active {
border: 2px solid #0004FF;
}
Now Save It.


Customization 

If you want to change background color then replace #FFFFFF this with your color code.
If you want to change border color then replace #000000 #FF0000 #0004FF this with your color code.


How To Get Color Code-Go to Our Hex Color Chart And Choose your favorite color and get the code.

DIY Blog Design | Creating a Header

Today's tutorial is going to be:  Creating a Blog Header.  But I am aware that some readers out there need me to take a step back and explain how to get started with a template, so I will give a brief rundown of that.
I started my blog using the Simple Template.  To do this, go to your blogger dashboard, click Template ----> Customize, then over to Simple.  The options on the left will allow you to make all necessary customizations to make it exactly what you want.  I chose the two column template, but it is completely up to you.  Adjust your widths, choose a background color, etc.  Click "Apply to Blog" to save.  Then "Back to Blogger."
The simple layout will give you a very simple ( Ha.  Get it?) visual of what your blog will look like.  There will be little squares all over your layout.  These are the different aspects that will make up your blog.  In your blogger dashboard, click on "Layout".  Today I will teach you how to install the header part located at the very top of your layout.  Here to be exact:
To create the header, I use the site www.picmonkey.com.  It's amazing and can pretty much do everything you will need to create your blog.  First, you will want to click "Edit a Photo" and upload ANY photo that you have.  Then on the left side, click on the fifth option down titled "overlays".  Click on the rectangle, and stretch it over your picture so it is completely covered.  Make the rectangle white.  At the top, click on the option labeled "Merge Together" (next to upload/save).  This will create one image and will look like this:
 This will be the background that you work on to create a header.  Once you have this, you can get as creative as your heart desires.  Use the text option to the left, and whatever else you would like.  Here is a very simple example of what can be done using text and geometric shapes.
 Next, you will crop your image into a rectangle.  After you crop, you will need to resize your image to about 800-900 megapixels wide, and about 200 tall.  To figure out the width of your blog, go back into the Template, hit Customize, and then Adjust widths.  This will show the width of your blog in terms of megapixels.   After sizing, SAVE the image (always as .png to avoid a grainy image) to your desktop.  The final image will look like this:
In your LAYOUT , click on the top box labeled "header".  A box will pop up and allow you to upload the image that you created and saved to your desktop.  Make sure you check the box that says "Instead of Title and Description".  SAVE.
That's it!  You can now hit "Preview" to view your new header.  You will then want to "Save Arrangement" to make sure it saves.  It's that easy.  

How to activate 3g in Idea


You need a 3G compatible handset. To know whether your handset is 3G compatible, SMS CHECK to 12345 (toll free).

To activate 3G services SMS ACT3G to 12345 (toll free).

Do dial *147# (toll free) to know about all the plans on offer.

To remain connected seamlessly, go to Network mode in your handset and select the option which provides both 3G & 2G connectivity. This option varies from Handset & Operating Systems.
Eg:In Nokia Symbian OS, the option is "Dual". In Samsung Android OS, the option is "GSM/WCDMA".

How to activate 3g in


How to activate 3g in Airtel

How to activate 3g in Airtel


To activate 3G on your existing Airtel connection steps are below:
 1) Check if your city has 3G available
 2) Call 12134 to activate 3G or SM 3G to 121 You will get a response saying reply with “1″ to activate 3G. Send 1 to 121. You will receive 3G profile via SMS within 4 hours. Save that and use it for the Internet applications as you do for 2G. Make sure your mobile Network setting is set for Dual Mode( 2g/3g UMTS) not just GSM mode. 

Airtel Latest Proxy Trick With Youtube and Facebook Support

This trick also support ssl sites.
This airtel 3g trick gves you speed upto 400kbps.
So lets start the trick Airtel 3G working proxy trick with youtube and gmail support-july 2012.Please friends if you like our article like us on Facebook !
Make the folllowing settings and try.

> Account Name= Airtel
 > APN=airtelgprs.com
> ProxyAddress=78.90.77.38

                  OR

> 37.157.193.137
> PORT=80
> HP=203.115.112.5 or any working HP

* Save the setting and make it default setting for your mobile.
* This Airtel trick support to gmail,youtube,facebook and ssl sites like mediafire and others.
* That' all for now friends, If you have some problem regarding this article then just comment here.

Airtel Free Internet Highspeed Proxy Trick


New proxy server for free gprs on Airtel.
This is working all over India. More over, it supports Highspeed Browsing and Downloading.
This trick will work with both 2g and 3g.


Latest Airtel Free 3g trick

Friends here is the latest high speed 3g speed hack for airtel gprs  using proxy servers. yes these proxies are giving 3g speeds and that too without deducting your balance, and without any 3g recharge. all you have to do is go to the network setting on your phone or on your modem and add the

Manual BSNL 3G/GPRS and MMS settings for Apple iPHONE

Manual BSNL 3G/GPRS and MMS settings for Apple iPHONE.
we will get Gprs setting Automatically.
But in case When Setting not delivered to your phone due to any reason, you have to call customer care.
Every one knows How Bsnl customer care supporting and Answering our calls !!
Many Apple I-phone Users searching for Manual Gprs and mms settings on intenet.
So Here is detailed Manual Gprs and Mms Setting For Apple i-phone which can be used in any model of Apple i-phone.

Free Streaming with BSNL watch TV


 For BSNL FREE STREAMING SETTINGS to watch Tv in Mobile.

Here is the trick  which is 100% working for 3G, 2G.

Use the following settings in your real player

BSNL Free 2G GPRS


To get free internet on bsnl gprs:

do the following settings:

apn:   bsnlmms
proxy:   10.188.128.128

BSNL HelloTV Hack

Great hack of bsnl hellotv:

By using bsnllive APN . visit bsnllive.net keep your balance below 5 rs.now go to hellotv option in bsnllive.net wapsite, then subscribe any channel pack you want. It will ask for confirmation as do you want to continue with the cost details, press yes, it will say subscription failed.don't worry. You can subscribe by simply editing the address of the error page. You need to change the price in the address to 0. 

Free BSNL 3G trick for PC

This is a free BSNL 3G  trick for PC.

Please read the whole post...

This trick is working in Karnataka, Try in your state... Here is the trick..

Step 1 connect mobile to pc. And set accesspoint settings to BSNLNET.

Step 2. Open default browser in mobile and select the APN which not open any site bsnlinternet.

Step 3. Then open any other browser in mobile and connect it with APN which gives temporary problem error message ie. Bsnlwap,  bsnlportal

Free Call Me Tone For BSNL

Follow the following steps to get your free Free Call Me Tone. 


1] Bsnl Free Call Me Tone Keep Ur Balance Under 2 rs

2] Send Song Name to 56799

FREE 4GB 3G DATA FOR AIRTEL

Hi friends here is a great Tricks for Airtel 3G User.

First activate Airtel 3G ( if you you use 2G SIM)

For Activation send SMS 3G to 121

You will receive a SMS  stating, 3G service is already active on your number. to choose your plan

replay with 1.1. Data Plan2. Deactivate 3G

Choose 1 for DATA PLAN

then Choose 13  (it may change for different circle)  for 4 GB free AIRTEL 3G DATA.

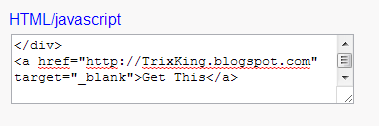
How to keep Code in a box in Blog Using JavaScript Box.

Javascript Box to put Your code
Screen Shot of Code Box
Put Code in Box in Blogger: JavaScript Box to Put Your Code in Blogspot Post
You might be thinking that the word box i used may not be the word should i use. however this word is pretty enough good to let you know that of what i am talking about.
if you are a blogger and providing services to the users some widgets codes to copy and paste in their blog. so you are the at the right place to learn and implement it on your blog too.
if you are a web developer you can also customize it to look different and stylish.

Tata Docomo Unlimited Free GPRS November 2012

Hi Friends

This is a new trick and is really working, many of friends are using this.
 
Make the following settings in the mobile:

Account Name :Tatadocomo (it can be anything)
Homepage: http://divein.tatadocomo.com
Acces Point : TATA.DOCOMO.DIVE.IN
Leave username and password as blank
Proxy address: 10.124.94.7

Create Multi Level Drop Down Menu In Blogger

This is a multi level drop down menu so that it will help you a ot to organize your categories and some important links,also it will help your readers to easily navigate through your blog.The HTML structure of this menu is so easy as you have to use only <ul> and <li> tags,but you have to add a different ul id for a new drop down,that is the little negative point of this menu.Just follow below steps carefully,you will easily add this menu to your blog.Now lets see how to add it to blogger blog,First take a demo of the menu.

How To Add Multi Level Drop Down Menu To Blogger


  1. Go to Blogger Dashboard > Layout
  2. Click on Add a Gadget (below header)
  3. Select HTML/JavaScript
  4. Paste below code inside it.

BSNL Trick to get 3G speed for limited time, best for only download lover.

No one can hack BSNL, As its servers are beyond strongest firewall that no one can break.

But there is a trick to get 3g speed for limited time  (best for only download lover).

Follow the steps:

Step1: you need 128k sim or higher is better(256k)


Step2: recharge rs.10 to convert 2g plan to 3g plan & u get 20mb 3g
data free (***be careful u need to do recharge not top-up***)